
How I fixed my lower back spasm for good!
I have suffered acute lower back muscle spasm on and off for almost 3.5 years now. If you suffer this too then it’s a literal pain in the ass right? The more I talk to about it ( moan that is ), the more people reveal they have similar issues too. Especially parents of small children. Gee, I wonder why?!
Over the years I’ve spent a small fortune on treatments and advice with an exceptionally good osteopath, chiropractor, physio, acupuncturist and masseuse. But never did I expect a nutritionist to complete the puzzle of my lower back pain. I’ve learned so much about how my body works from the inside out and I would love to share my step by step journey that has not only helped me to become pain free, but also reduce the chances of it ever happening again.
In early January of this year, after a deliciously indulgent Christmas, I suffered the worst lower back muscle spasm I’ve had yet. I thought I was doing so well, I'd been pain free and feeling strong for 8 months but one day, as I scooped up Cooper ( 14kgs ), I twisted slightly as I came up and out of a squat-like position the and BOOM! I was on the floor writhing in pain and could hardly walk due to my lower back muscles in full spasm. For 3-4 days I was in serious debilitating pain. I felt twisted and lop-sided. Walking, sitting and lying down were damn uncomfortable. I couldn’t pick up my kids, couldn’t drive, couldn’t push the stroller, struggled to get on and off the loo and into the shower. Thank goodness for the help of my husband!
In my case, since having children and fast approaching 40, my body’s core strength hasn’t yet returned to it’s ‘new normal’. I’ve mentioned this before in a previous rant about ‘parental injuries’, but after having a baby, it can take up to 2 years for the body to ‘get back to normal’ ( a new normal that it is, not the old familiar normal ), and what I mean by that is the settling down of hormones, ligaments, joints, muscles and the mind, to name a few! ( well, I’m certain I have permanent baby-brain damage ha ha! ). BUT believe it or not, my gut health was also contributing to my lower back injury and pain. Did you know the gut is also known as our second brain? In fact, my injury was likely a chain reaction starting in my gut first that then led to muscular laziness in my ass. Brilliant. Dairy & gluten being the worse culprits for me. ( Note, I don’t usually eat a lot of diary or gluten, but naturally over Christmas I ate anything and everything. ) As soon as I dropped these 2 things from my diet and added more anti-inflammatory foods, I noticed a huge difference in the pain I was suffering almost immediately. The chain reaction in my gut coupled with a weak core from having children led to weakness in my backside. This was a true “EUREKA!” moment for me.
But diet alone isn’t going to improve the strength of my muscles. As they say, if you don’t use it you lose it! The gluteals are the biggest and laziest muscle in the body yet it supports pretty much the whole body. I had literally been agonizing over ‘why is this happening to me, again!?’. I’m so relieved to have finally got to the root of the problem. Knowing that the muscular spasms I had experienced were also connected to my gut health and diet meant I could treat my ‘injury’ in a completely new and more effective way.
After adjusting my diet, I had to address the physical. I spoke with my doctor, osteopath and physio and it was clear that my weak gluteals were an issue. My glutes were not firing up when I needed them to and instead, my back was taking the load. It wasn’t that I had bad posture or form either, my glutes were literally asleep on the job and not responding to my brain. Also, given the amount of times this had occurred over a 3.5 year period, my lower back muscles were now over sensitive and prone to spasm, a bit like muscle memory. So, I decided to start from scratch and document my own rehabilitation to sort out my problem for once and for all. It’s time to put this debilitating and unnecessary drama to an end! YES!!
This is a step by step guide ( as advised by my collection of professionals ) on what I did to become pain free, to work on building strength and improve my gut health:
Step 1:
Get a professional diagnosis and opinion:
I immediately spoke to a professional. Don’t delay! I spoke with my doctor who then referred me to a physio. I also visited my amazing osteopath and acupuncturist to help manage the pain and weird body contortion in the early days of spasm.
Step 2a:
Treat Inflammation internally through nutrition:
Food is medicine. Personally I can’t take most over the counter painkillers ( I’m allergic to the binding ingredients in the pills, not the pain killer itself ), and these can also cause issues with gut health. I prefer to find natural ways through nutrition to help reduce inflammation in my body. Gut health is linked to pretty much everything. I reduced all inflammatory foods and increased foods that have an anti-inflammatory response in the body. Thank god red wine is considered anti-inflammatory!
Generally speaking, foods to avoid:
Refined sugar
Gluten
Dairy
Nasty additives
Generally speaking, foods to eat more of:
Bok Choy
Acai fruit
Allium vegetables (chives, garlic, leeks, onions, scallions and shallots)
Beans and lentils
Green leafy foods
Hot peppers
Nuts and seeds
Sprouts
Try my anti-inflammatory Turmeric Latte, Turmeric Pancakes or my Allspice Smoothie
Step 2b:
Treat inflammation externally with hot and cold press:
During the first 1-3 days of my lower back muscle spasm, my guru osteopath recommended I use a cold press for 10mins and then a hot press for 10mins and interchange between them for as long as I could bare it, all day, for about 3 days. This really does help provide some relief and brings down the inflammation too. It was however important for me to also keep moving ( gentle walking about ) every 30mins for about 10-15mins, otherwise my back muscles would seize up. Upon waking most mornings I was dreadfully stiff and sore until I moved around and the blood flow helped ease the pain a bit.
Quick video on how to apply the cold and hot pack if you’re not sure:
Step 3:
Start to gently stretch:
From day 3-7, my inflammation had reduced so I was able to start stretching. ( Becareful not to stretch too early as this can aggravate the spasm again ) I would do one of the gentle stretch routines my Osteopath taught me, 3 times a day. First after a hot shower, second around lunchtime and lastly before bed. Here are are couple of stretching routines I do that really help.
Stretch routine option 1:
http://www.bypieta.com/sweat/2016/11/17/top-5-exercises-to-a-pain-free-lower-back
Stretch routine option 2:
http://www.bypieta.com/sweat/2016/12/16/7-effective-moves-to-help-relieve-lower-back-pain-now
Step 4:
Begin gentle gluteal & core activation exercises:
From day 7-10, I continue to do the stretch routine once per day + my physio recommended 6 gentle exercises that help engage the muscles and brain without any pressure on the back. I did these twice per day, morning and evening.
* There is an awesome subscription site I found called physiotools.com which has oodles of exercises and techniques you can follow if you forget the technique your physio taught you.
1. Pelvic Tilting: Lie on your back with your knees bent up and feet on the surface. Start by tilting your pelvis a little so your back arches a bit. Now press the small of your back down to the surface and tuck your bottom under. Do not lift your buttocks up, this is a forward and back rocking motion and often tricky to get right. You should feel the small of your back has pushed down against the surface. If put your hand under your back when you arch slightly you will feel the pressure as you tilt correctly in the opposite direction. You could do this exercise in a sitting position too, so you could this anytime you are sitting at your desk or in the car! Helps ease stiffness.
2. Gluteal Clench: While standing, clench the butt muscles as tight as you can for a few seconds and release. Do this as often as you can, and remember eg: standing at the kitchen bench cooking dinner! Doing this at the tube station might get a weird look. ha!
3. Hip Extension in Lying : Begin this exercise lying on your stomach. Rest your head on your hands. Keeping your knee straight, slowly lift your left leg, tightening your bottom muscles (gluteals). Hold for 2 seconds then slowly lower your leg back down. Repeat on the right leg. Repeat 10 times on each leg provided the exercise is pain free.
4. Log roll: Perform the log-roll in an open area on a mat, carpet, clean smooth surface or on grass. Begin to do the log-roll exercise in a horizontal position lying on your back. Stretch the arms straight upwards over your head. Look in the direction you want to roll, then cross the outer arm over your chest pointing in the direction you are rolling. Tighten the knees, keep your legs straight, push down thorough you heel on the outer leg and point your toes while the foot slants downward. Roll your body slowly to the left or right and roll completely over. Roll back, and repeat 4 times each side.
5. Bosu Bridge both legs: Most of us don’t have a ‘Bosu’ which looks like a swiss ball cut in half ( your gym might have one though ), in which case you can use the seat level of your couch at home. Start in a bridge position with your shoulders placed across the center of the Bosu ( or couch ) and your neck neutral. Keep both feet on the ground ( knee and ankle inline which each other ) and place your hands on your hips. Pressing through your heel on the floor, lift your buttocks up until your hips are flat. Make sure to fully contract your hamstrings and glutes at the top of the motion. Lower your body back down to the floor and right before your butt touches, press yourself back up for 20 reps x 3 sets
6. Bosu Bridge single legs: Same as above, but prop one leg out straight onto a foot stool or washing basket, so you are focusing on one leg at a time for 20 reps x 3 sets, each side!
Step 5:
Begin gentle strengthening exercises
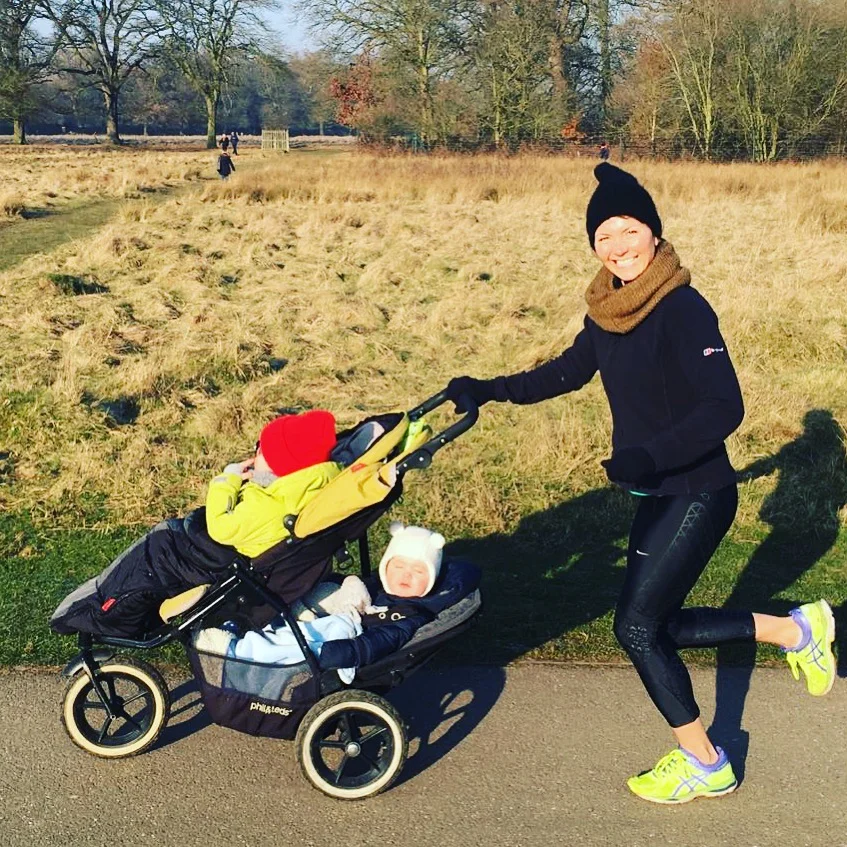
From day 11-14, I continue to do my stretch routine once per day + my physio recommended 5 new exercises to rebuild strength in my gluteals and core, again without putting too much pressure on my back or twisting. You can do these at the gym, at home.. or in my case outside in the park!
Watch my video on how my physio taught me to do each exercise!
Following these steps and committing to rehabilitation meant my recovery time was halved! Usually it would take me 4 weeks to feel relatively normal again, but this time it only took 2! These steps really helped me learn about how the body works inside and out and how to prevent this from happening again. Note to self: keep building strength and lay off the cheese and bread!
I wish you all the best in your recovery too!
Helpful resources:
Gut Health - Ben Warren’s top 10 tips for a healthy gut
https://www.youtube.com/watch?v=SRdEEC4i_3w&t=2500s
Inflammatory foods to avoid:
https://draxe.com/inflammation-at-the-root-of-most-diseases/
Anti-inflammatory foods to eat more of:
https://draxe.com/anti-inflammatory-foods/
Somatic exercises ( a friend recommended this! very interesting! )
http://essentialsomatics.com/hanna-somatics-exercise-video-library/

